Standard Events
Build custom effects using standard events - individual triggers with precise timing control.
Create a New Effect
If you're still using a protected effect, you'll need to create a new effect before you can add events.
- Open the actions dropdown menu and select new effect
- Leash will automatically select the newly created effect
- Your new effect is completely empty and you'll need to add Events to trigger cameras and strobes.
new effect always duplicates the currently selected effect. Effects are saved to the WOLF node, not the computer.

Add Your First Event
Let's trigger a camera.
- Open the Events (0) tab
- Click event+ to add a new event
- Enter the following values:
| Time | Camera | Instruction Type | Instruction |
|---|---|---|---|
| 0 | 1 | TRIG | ON |
- Click Save
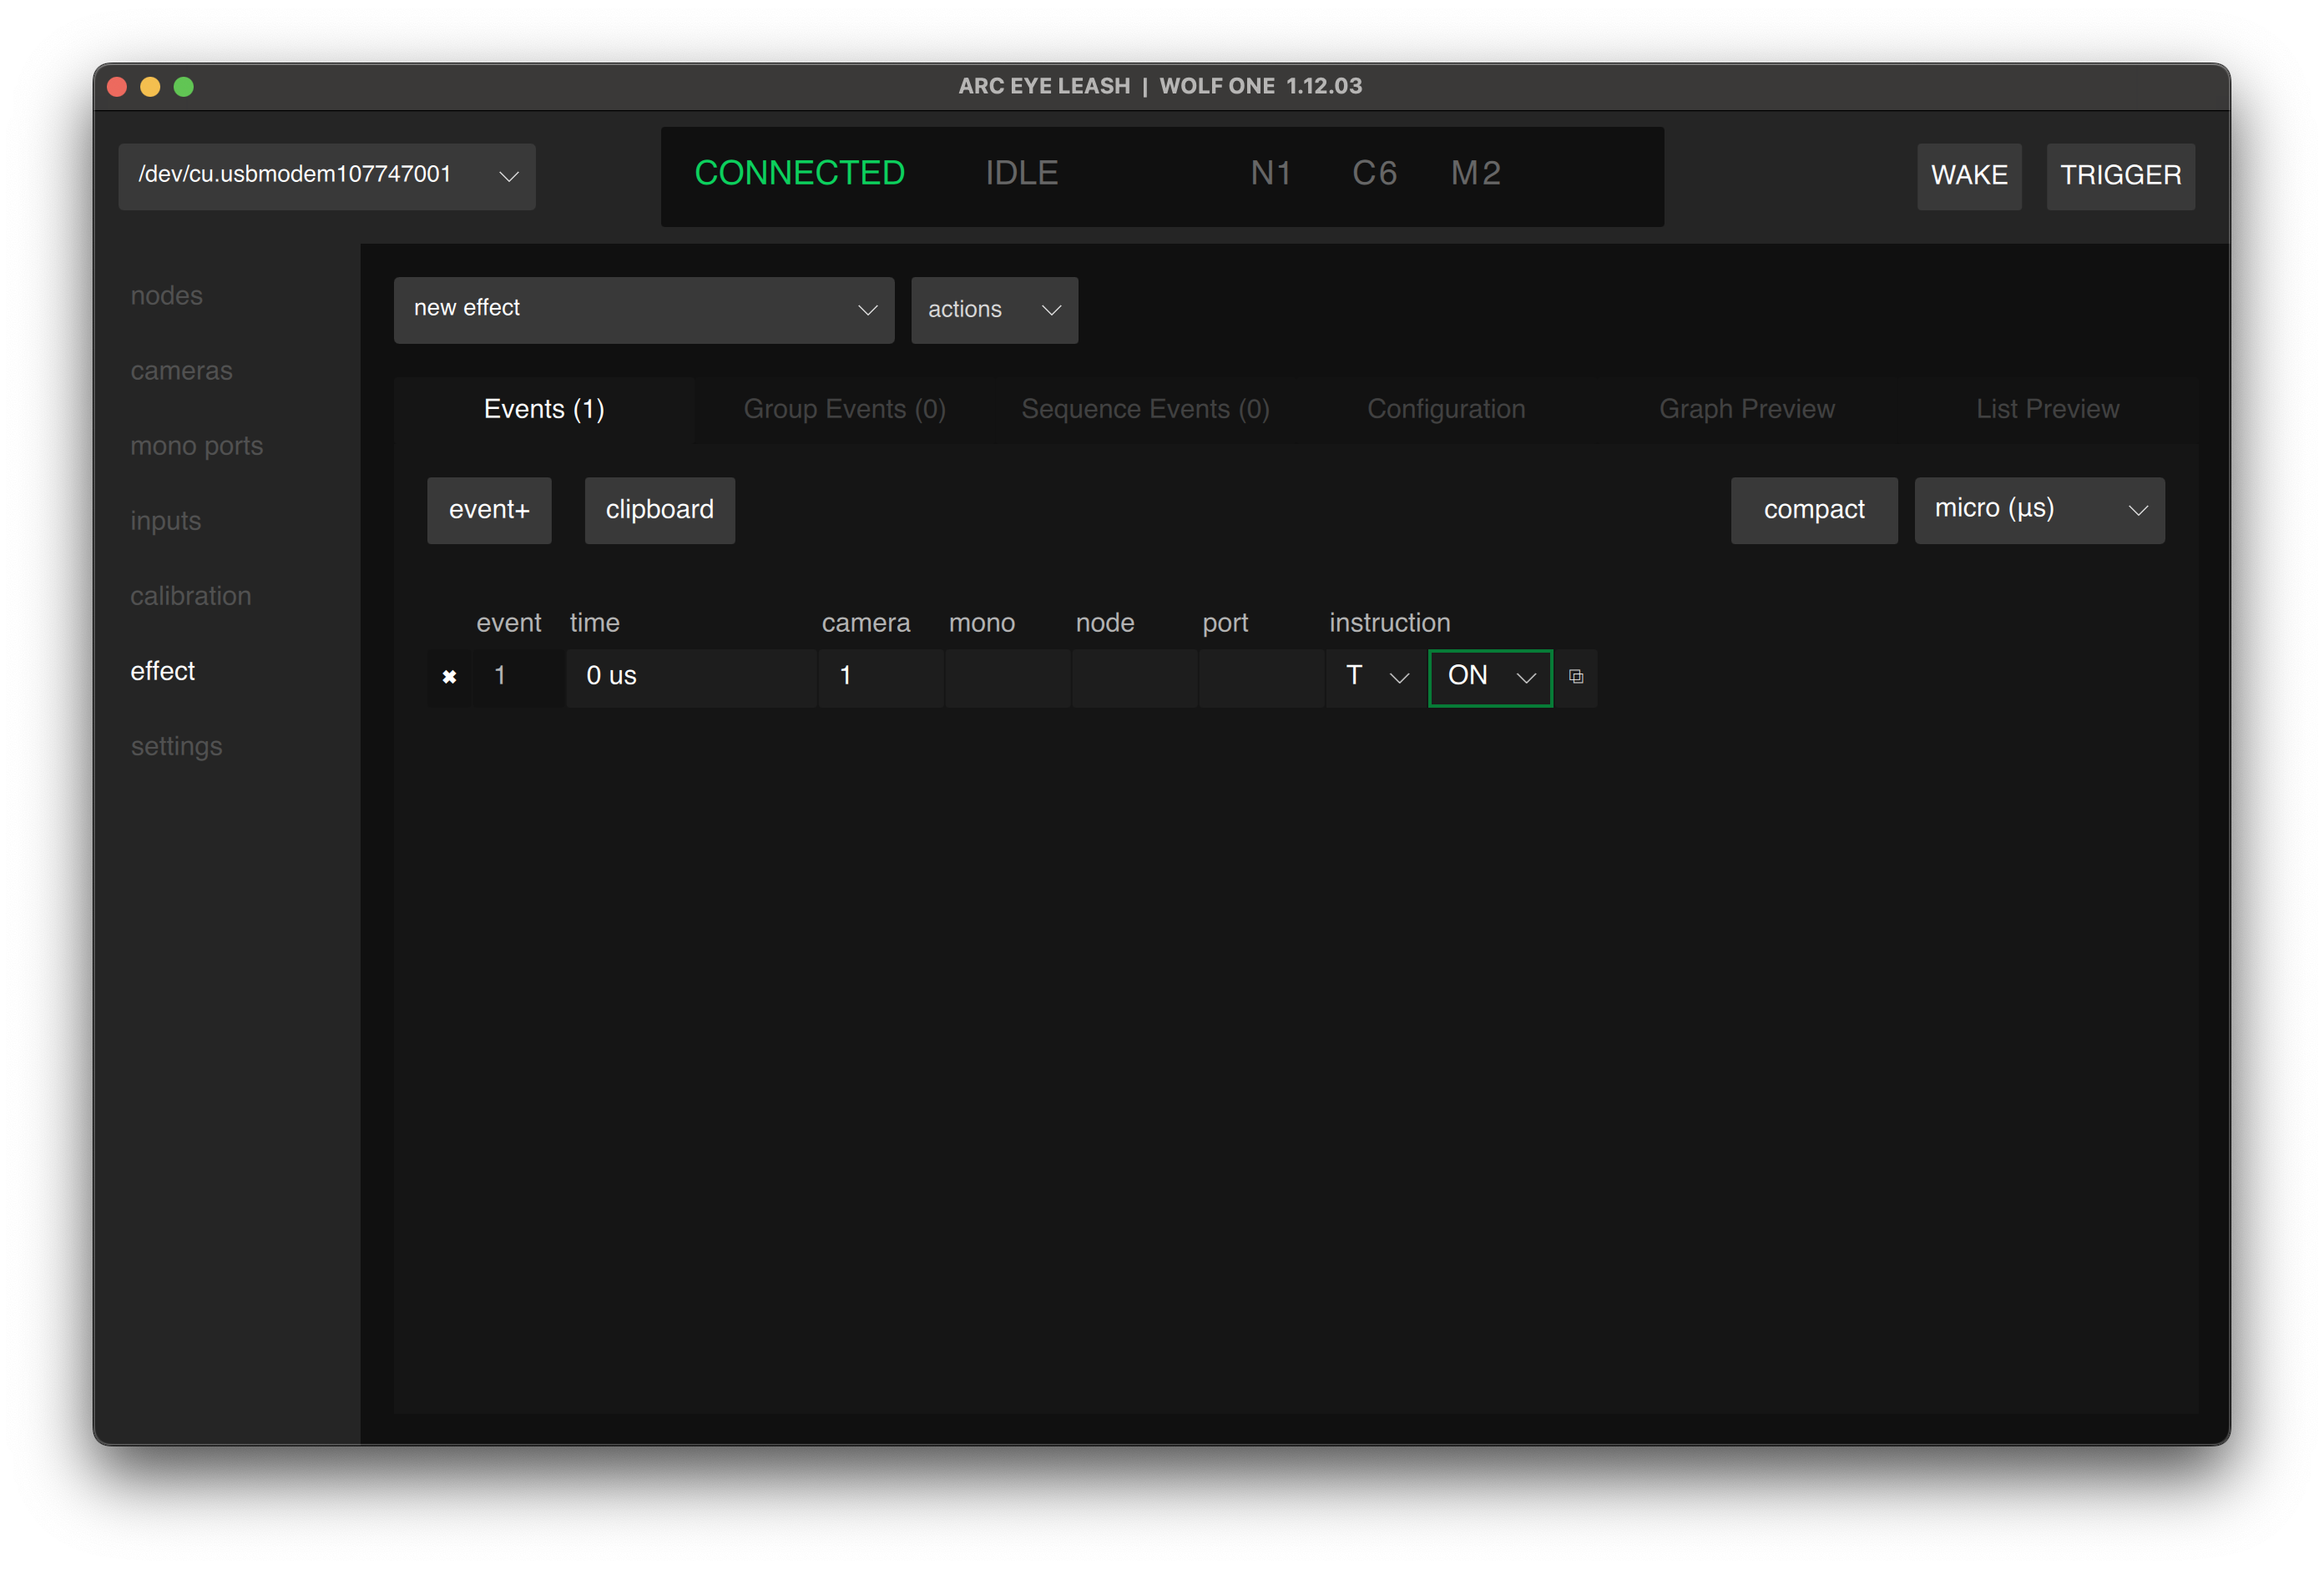
Every event needs a time, target (camera, mono, node.port), instruction type (T/W), and instruction (ON/OFF). Events with missing data show warnings and prevent saving.
Add a Mono Port Event
Let's trigger a strobe with our camera.
- Click the duplicate icon on the right of our camera event
- Clear the Camera field
- Enter:
| Time | Mono | Instruction Type | Instruction |
|---|---|---|---|
| 0 | 1 | T | ON |
- Click Save
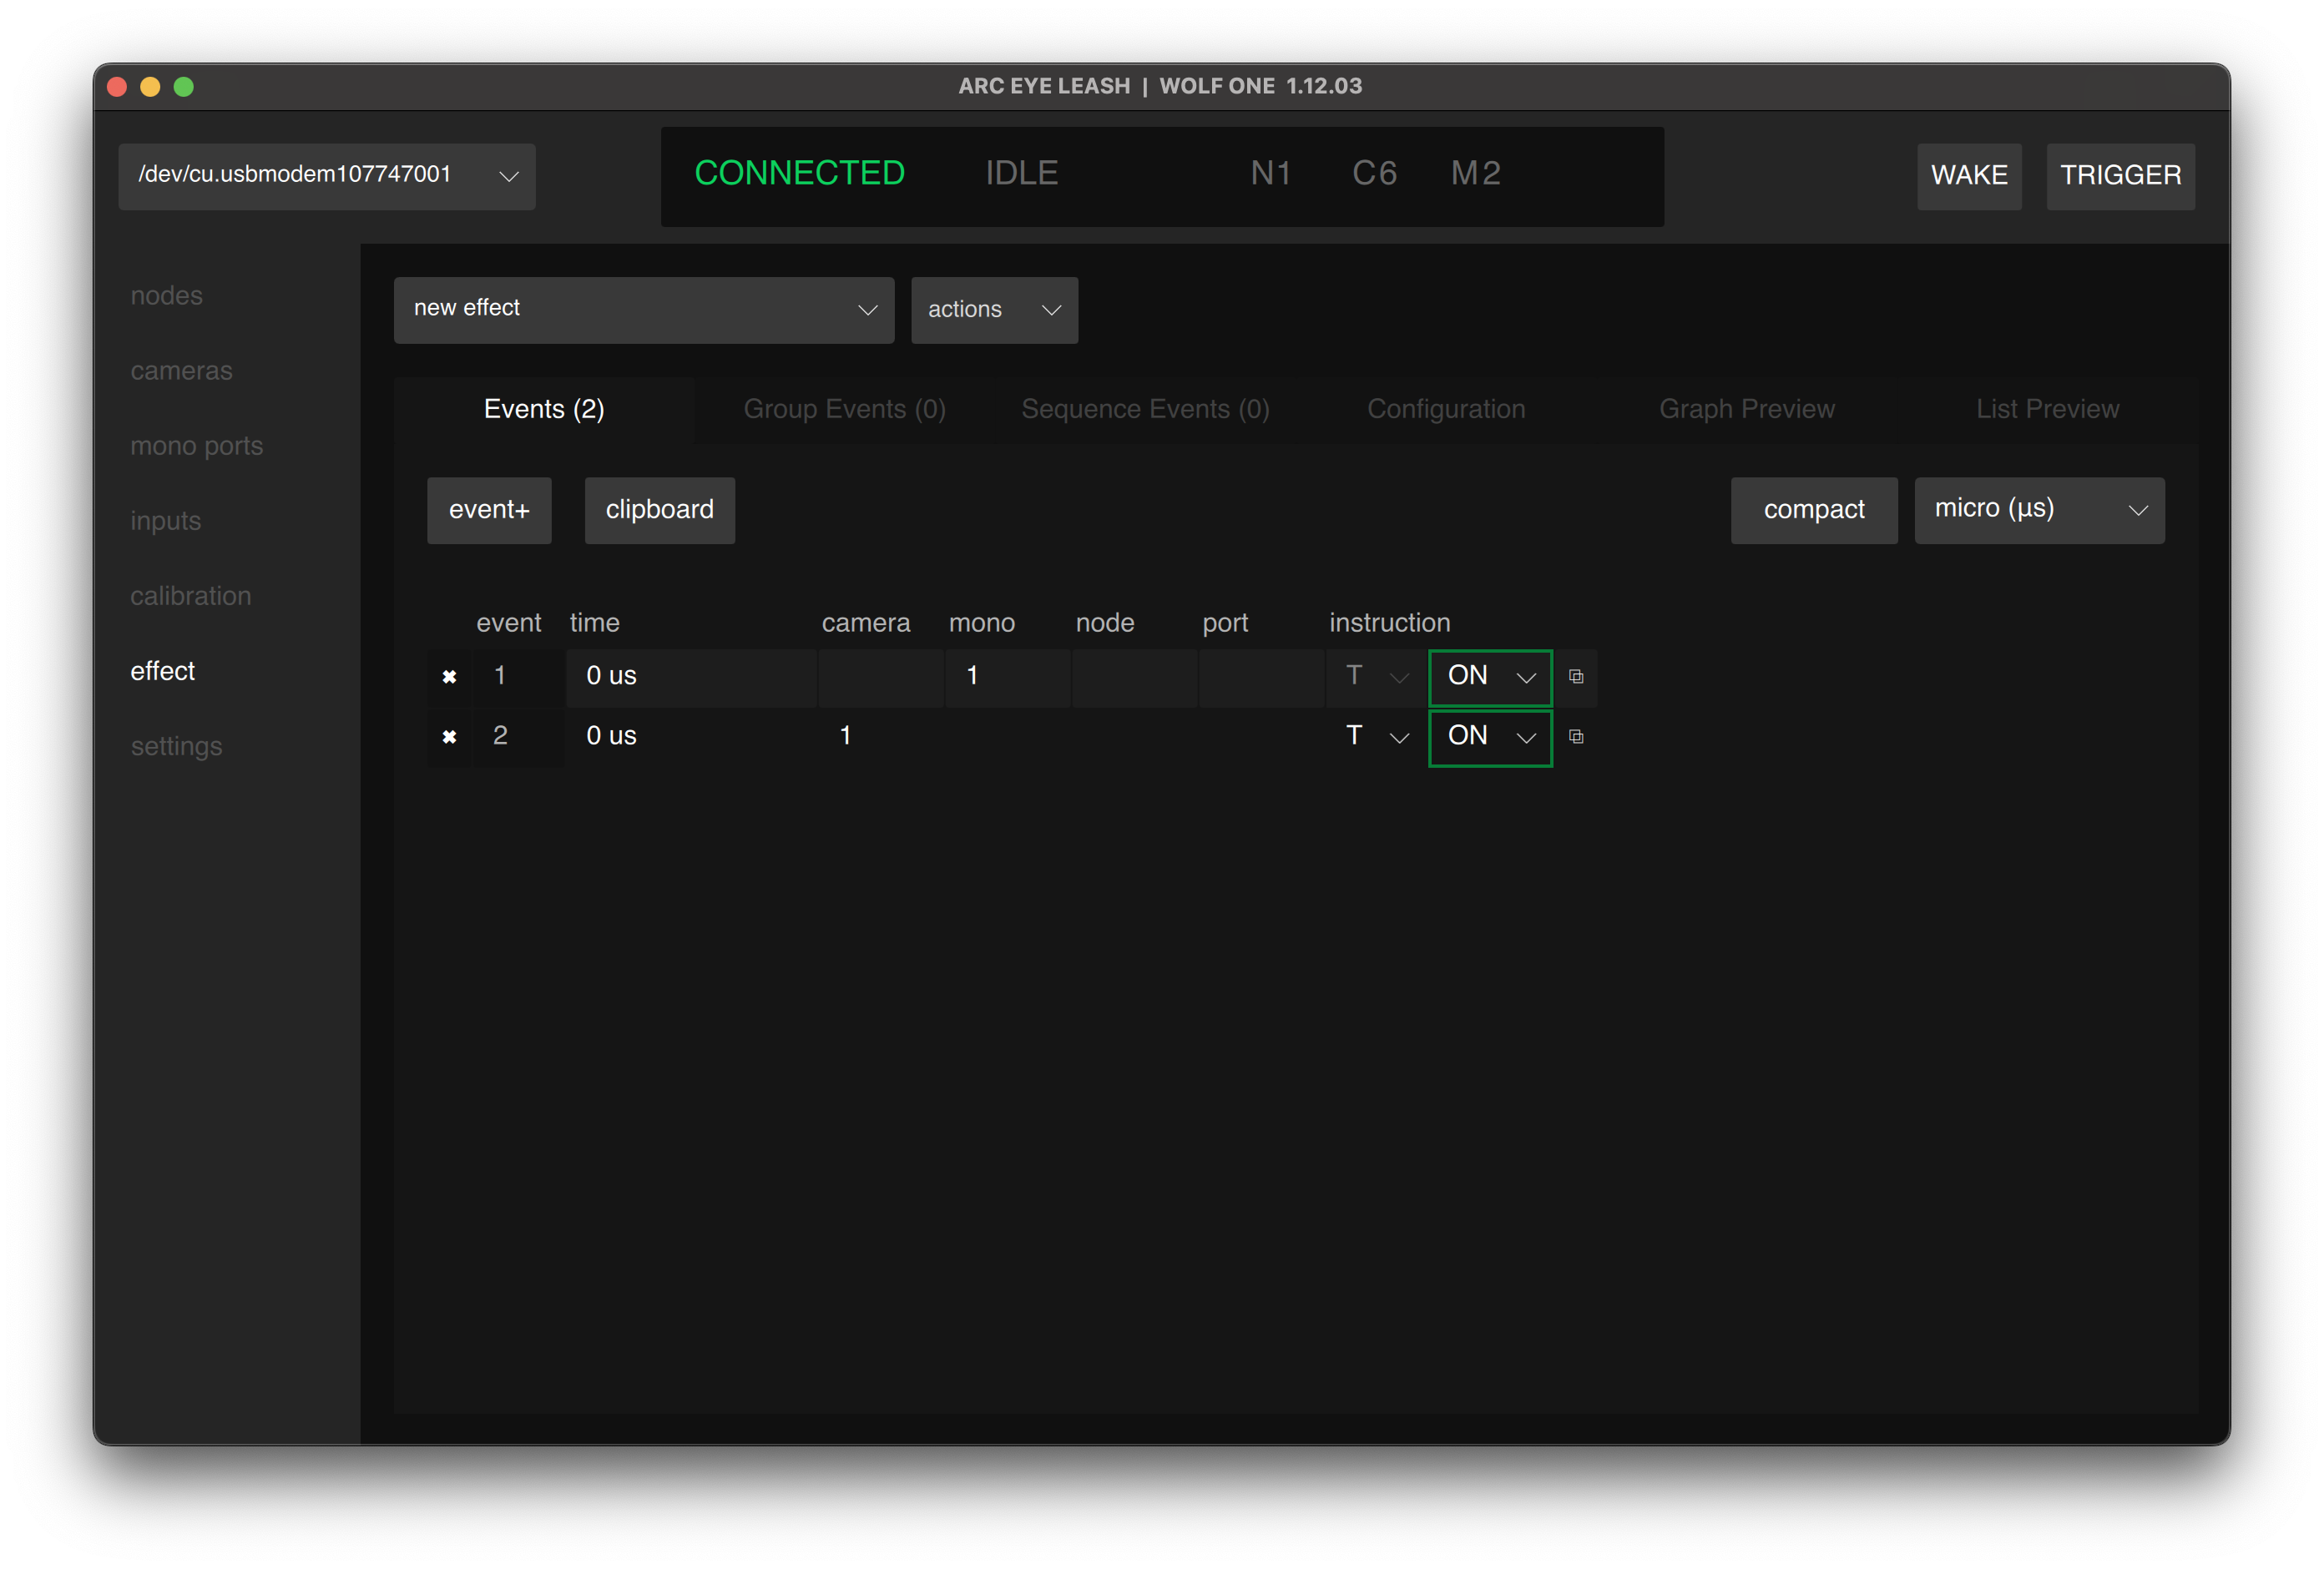
Both events trigger at time 0sec so the camera and mono port (typically a flash) fire together.
If you haven't already, now is a good time to calibrate your camera to achieve strobe sync.
Create a Multi-Trigger Sequence
To trigger an output twice. Turn it ON, OFF, then ON again.
- Change the time unit dropdown in the upper right corner from micros (us) to sec (s)
- Duplicate the camera and strobe event
- Change the new events to:
| Time | Camera | Mono | Instruction Type | Instruction |
|---|---|---|---|---|
| 100ms | 1 | T | OFF | |
| 100ms | 1 | T | OFF |
- Duplicate the camera and strobe events once more
- Change the new events to:
| Time | Camera | Mono | Instruction Type | Instruction |
|---|---|---|---|---|
| 1s | 1 | T | ON | |
| 1s | 1 | T | ON |
- Save
The result should be six events, as seen below.
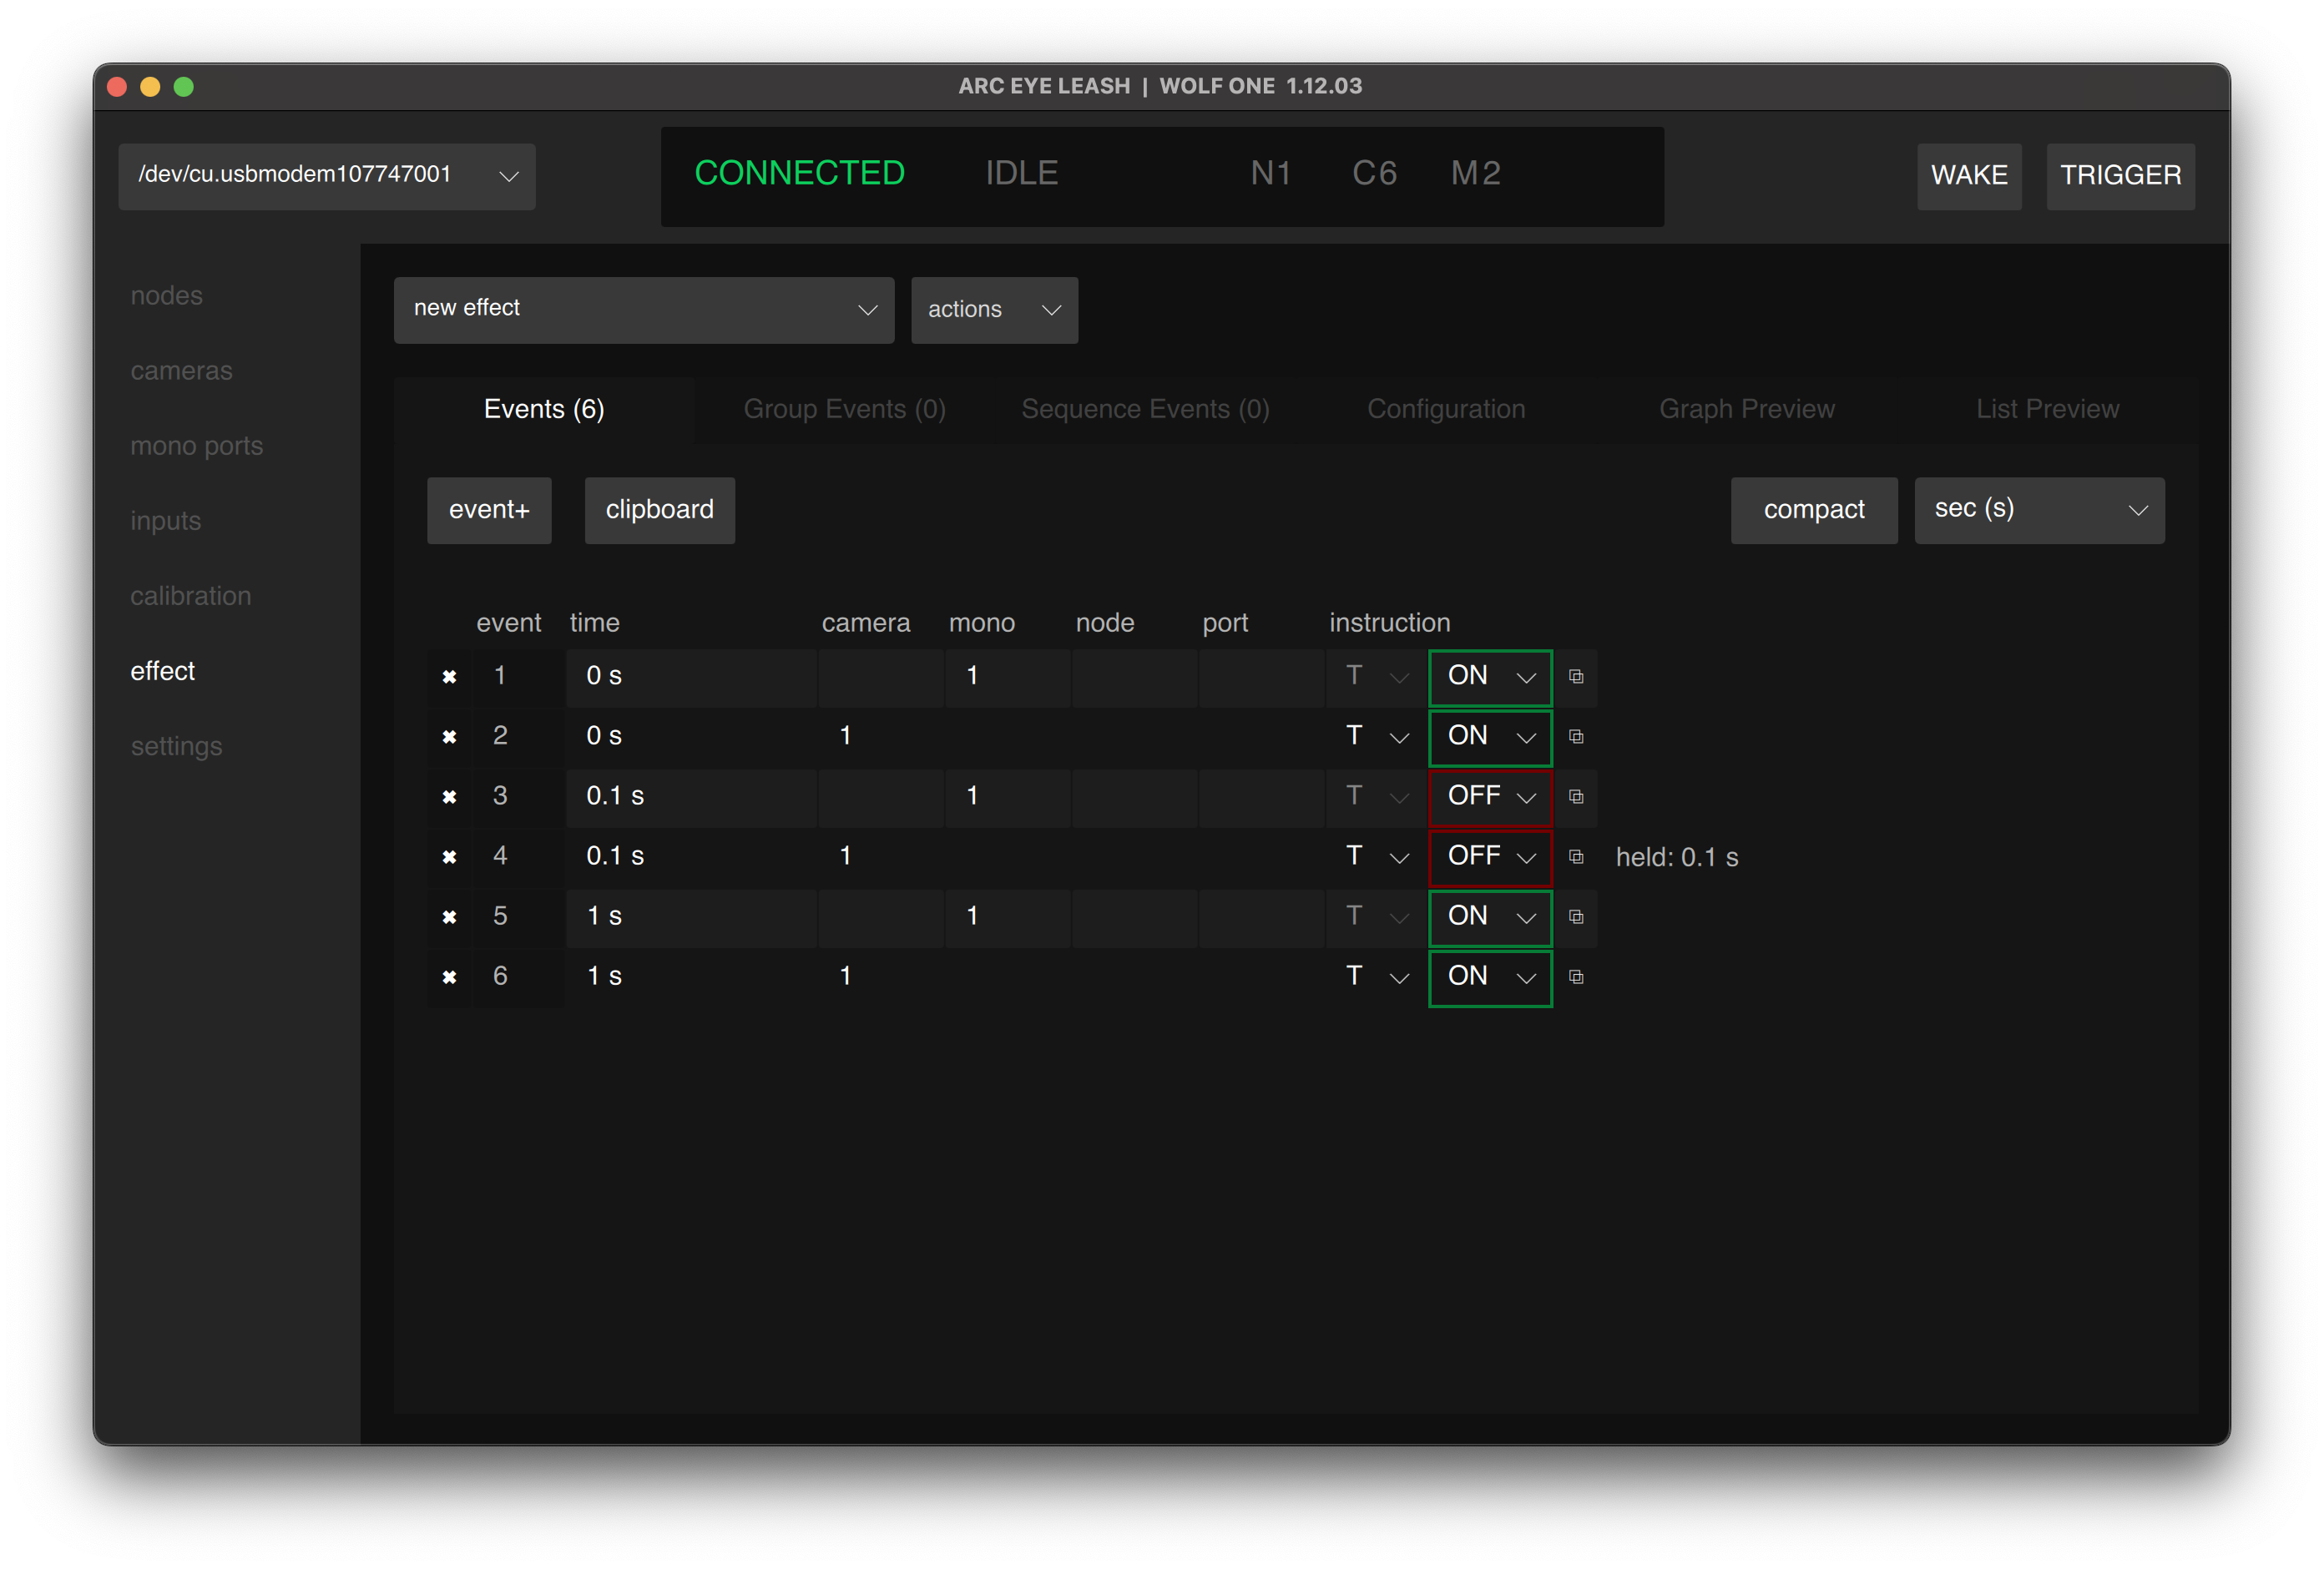
You can type values with units like "100000 us", "100 ms" or "0.1s" and press Enter/Return to submit and it will automatically convert to the currently selected time unit.
Preview Your Effect
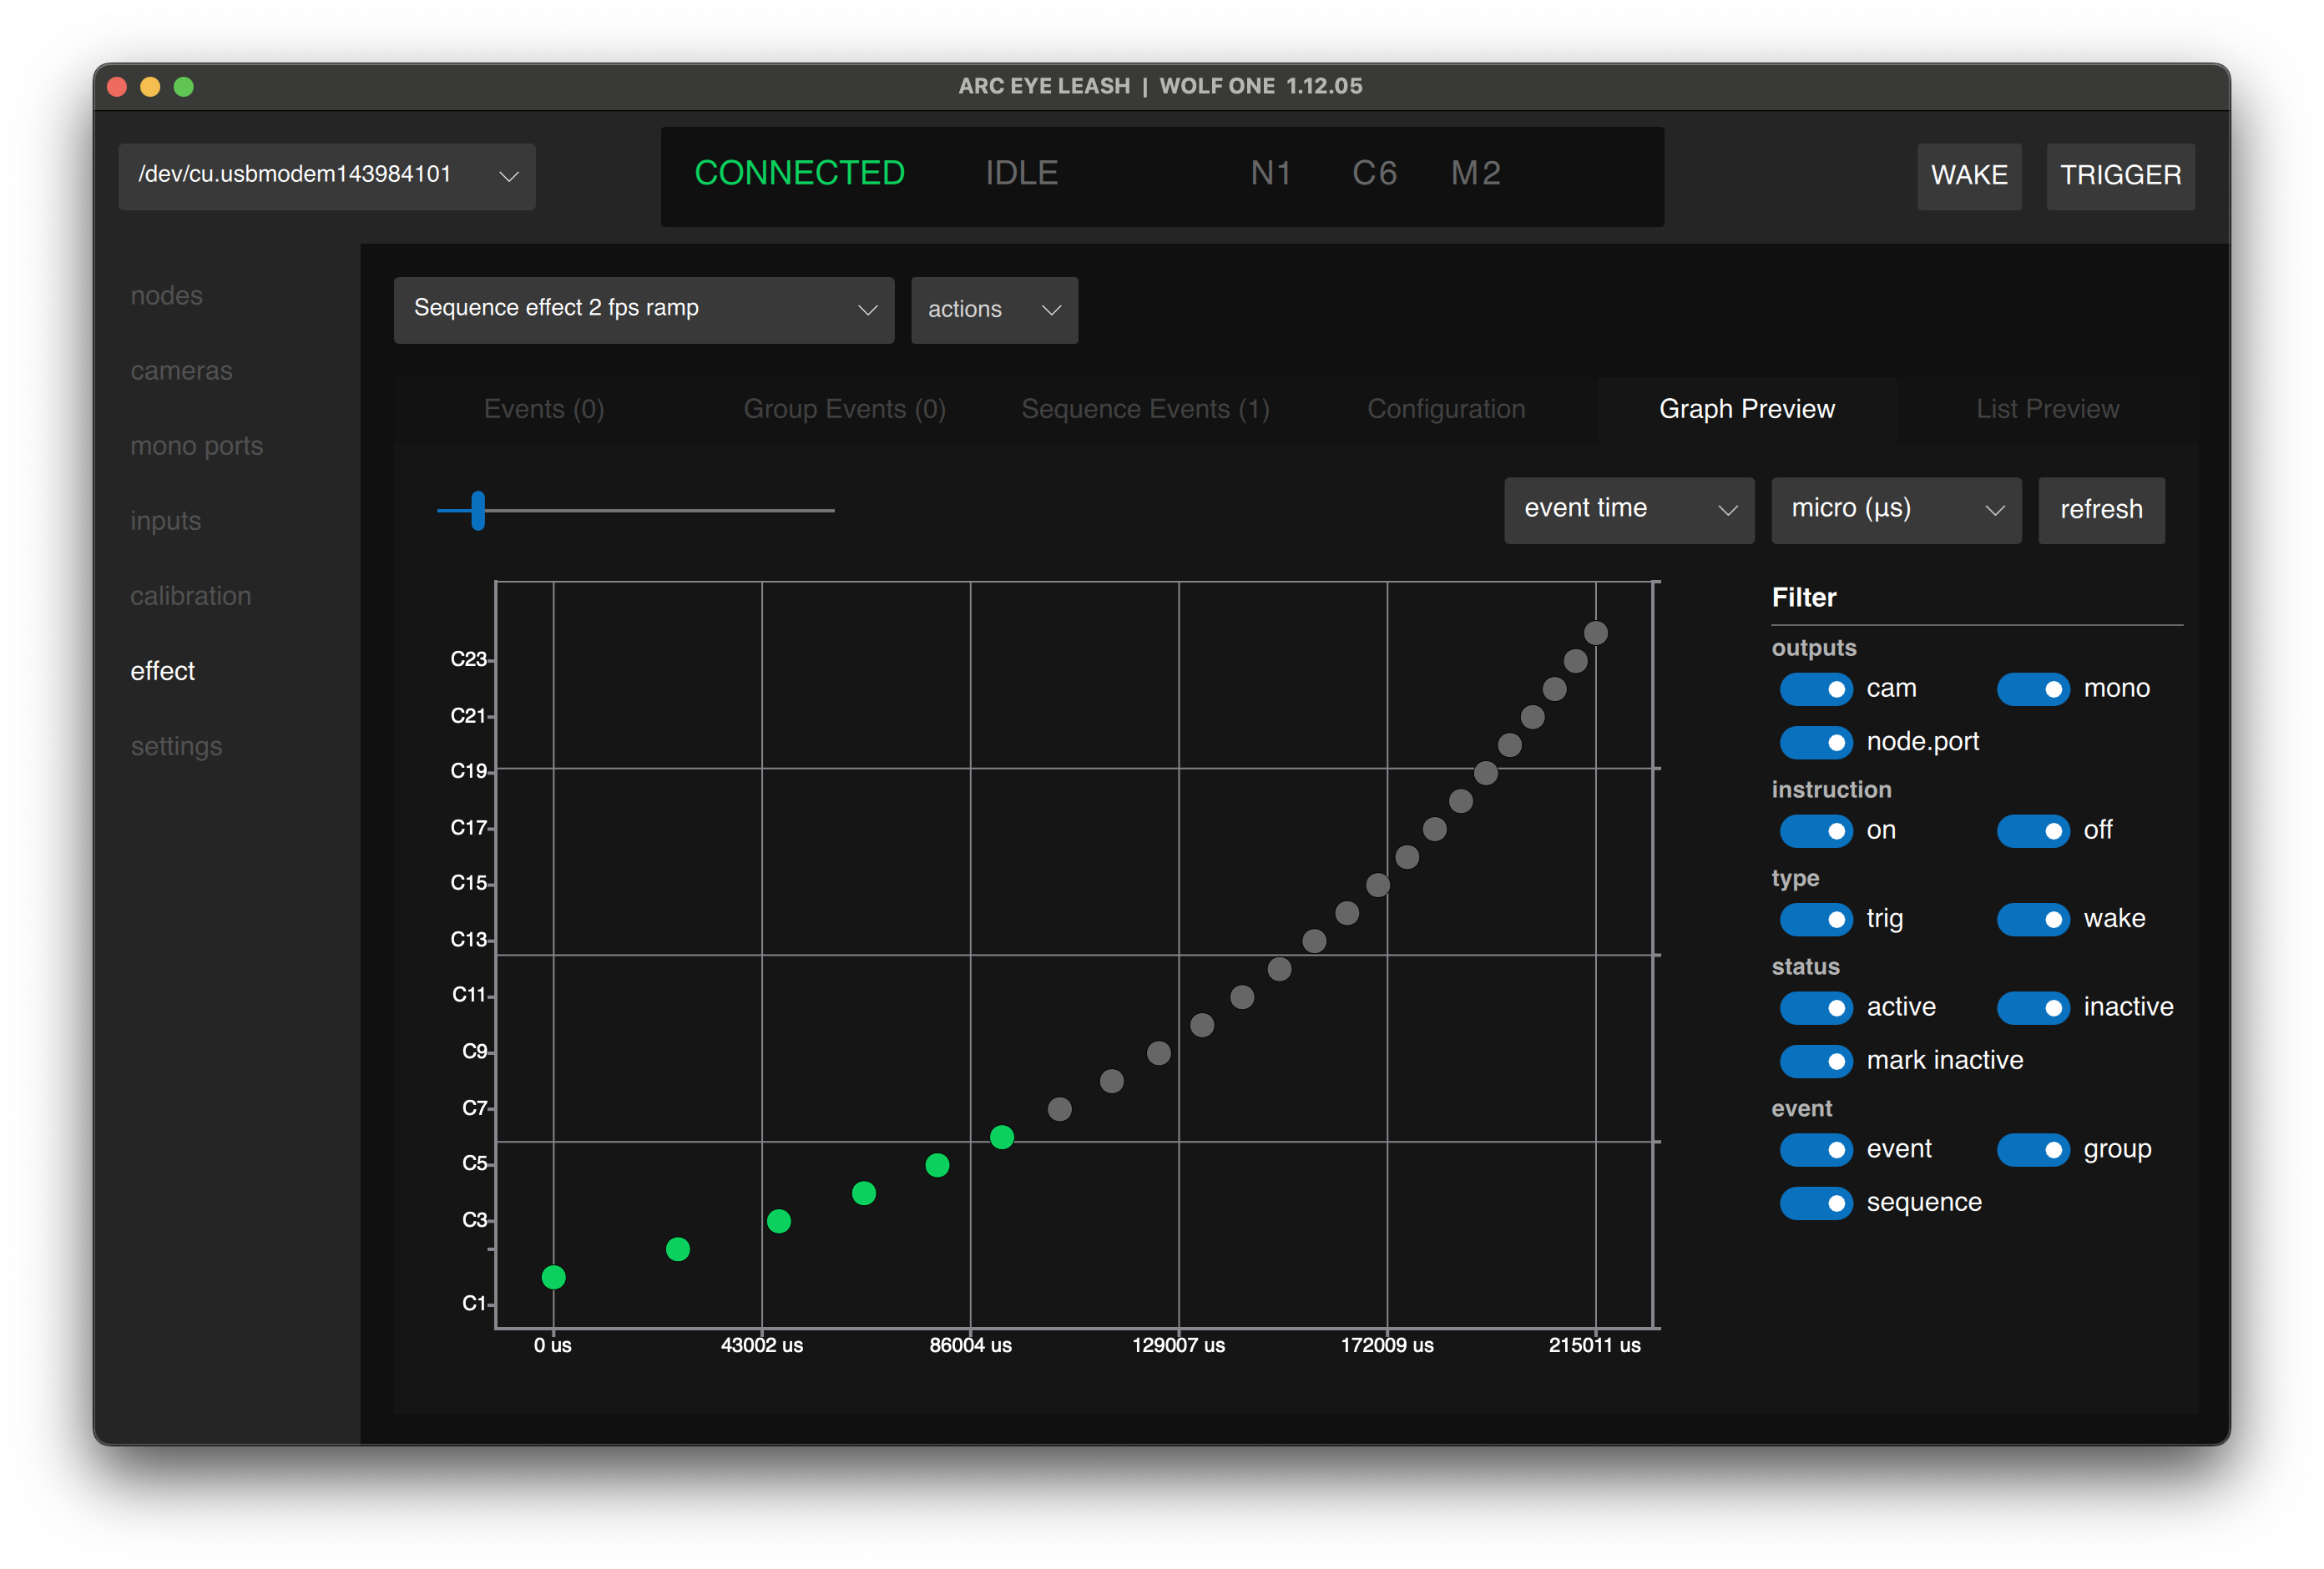
Graph Preview
Each dot represents an event. Wake events appear in teal, trigger events in green. Switch from "event time" to "calibrated time" to see timing with calibration offsets applied.
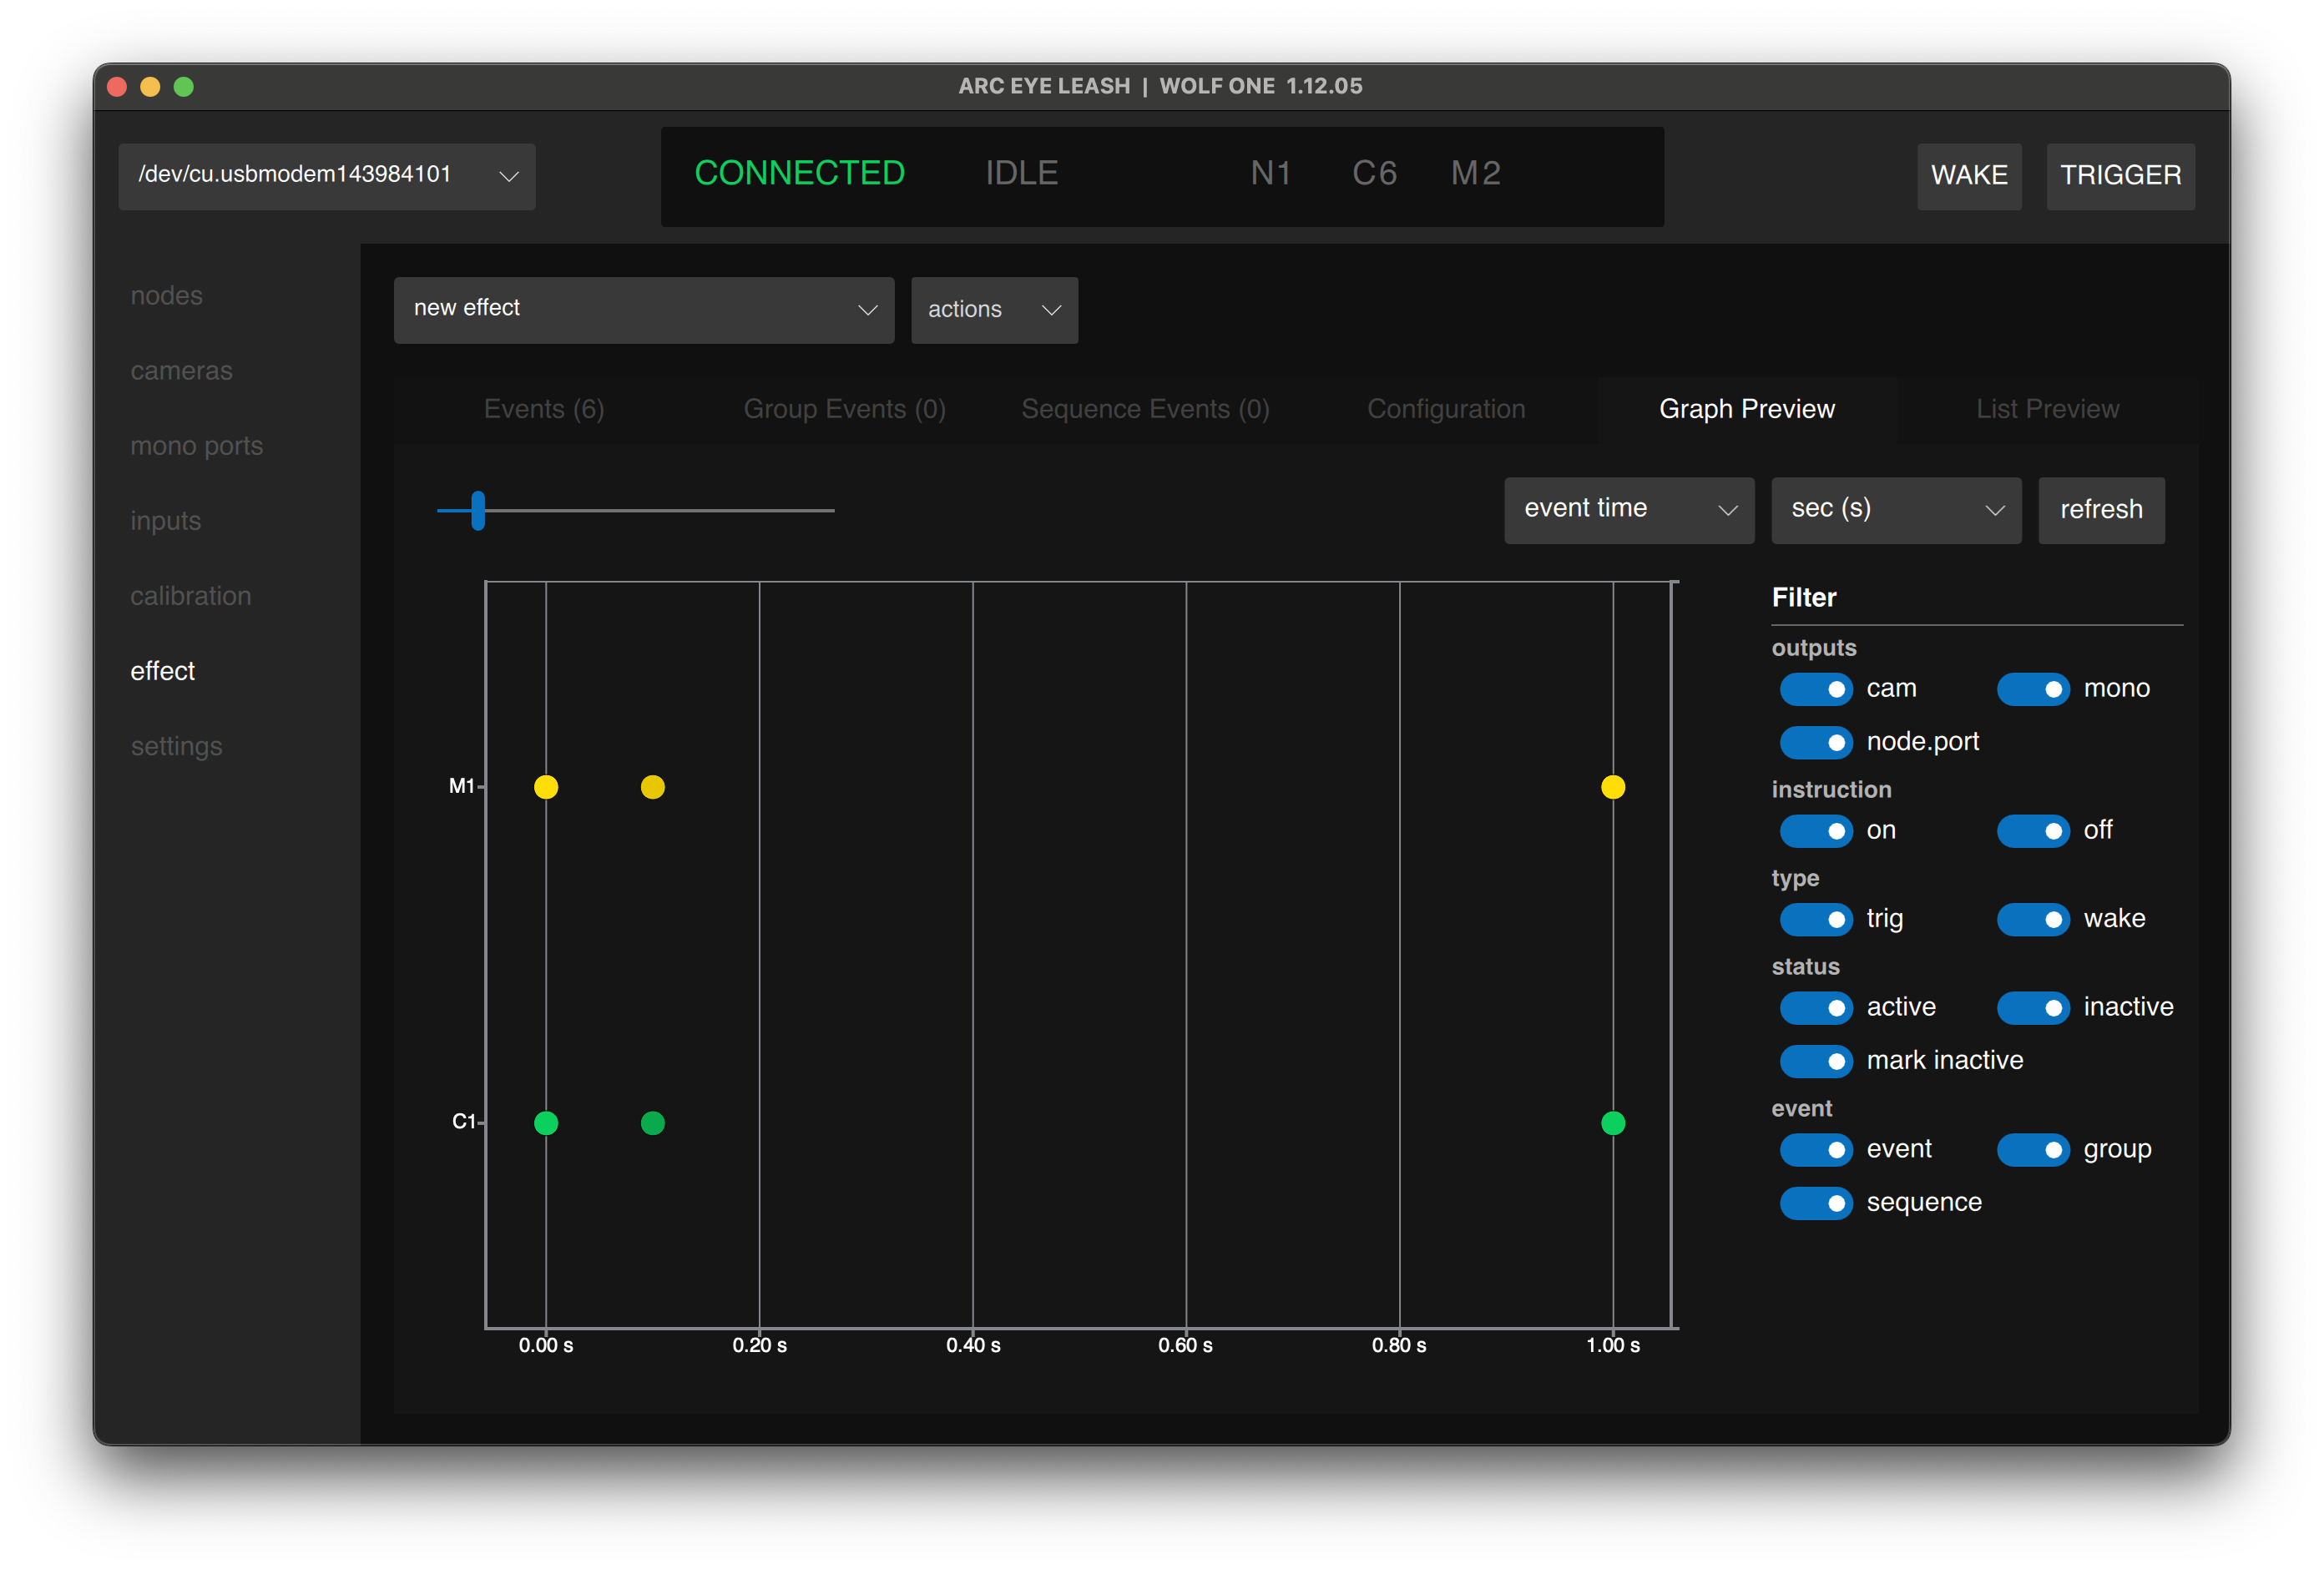
Open List Preview to see event timing in greater detail.
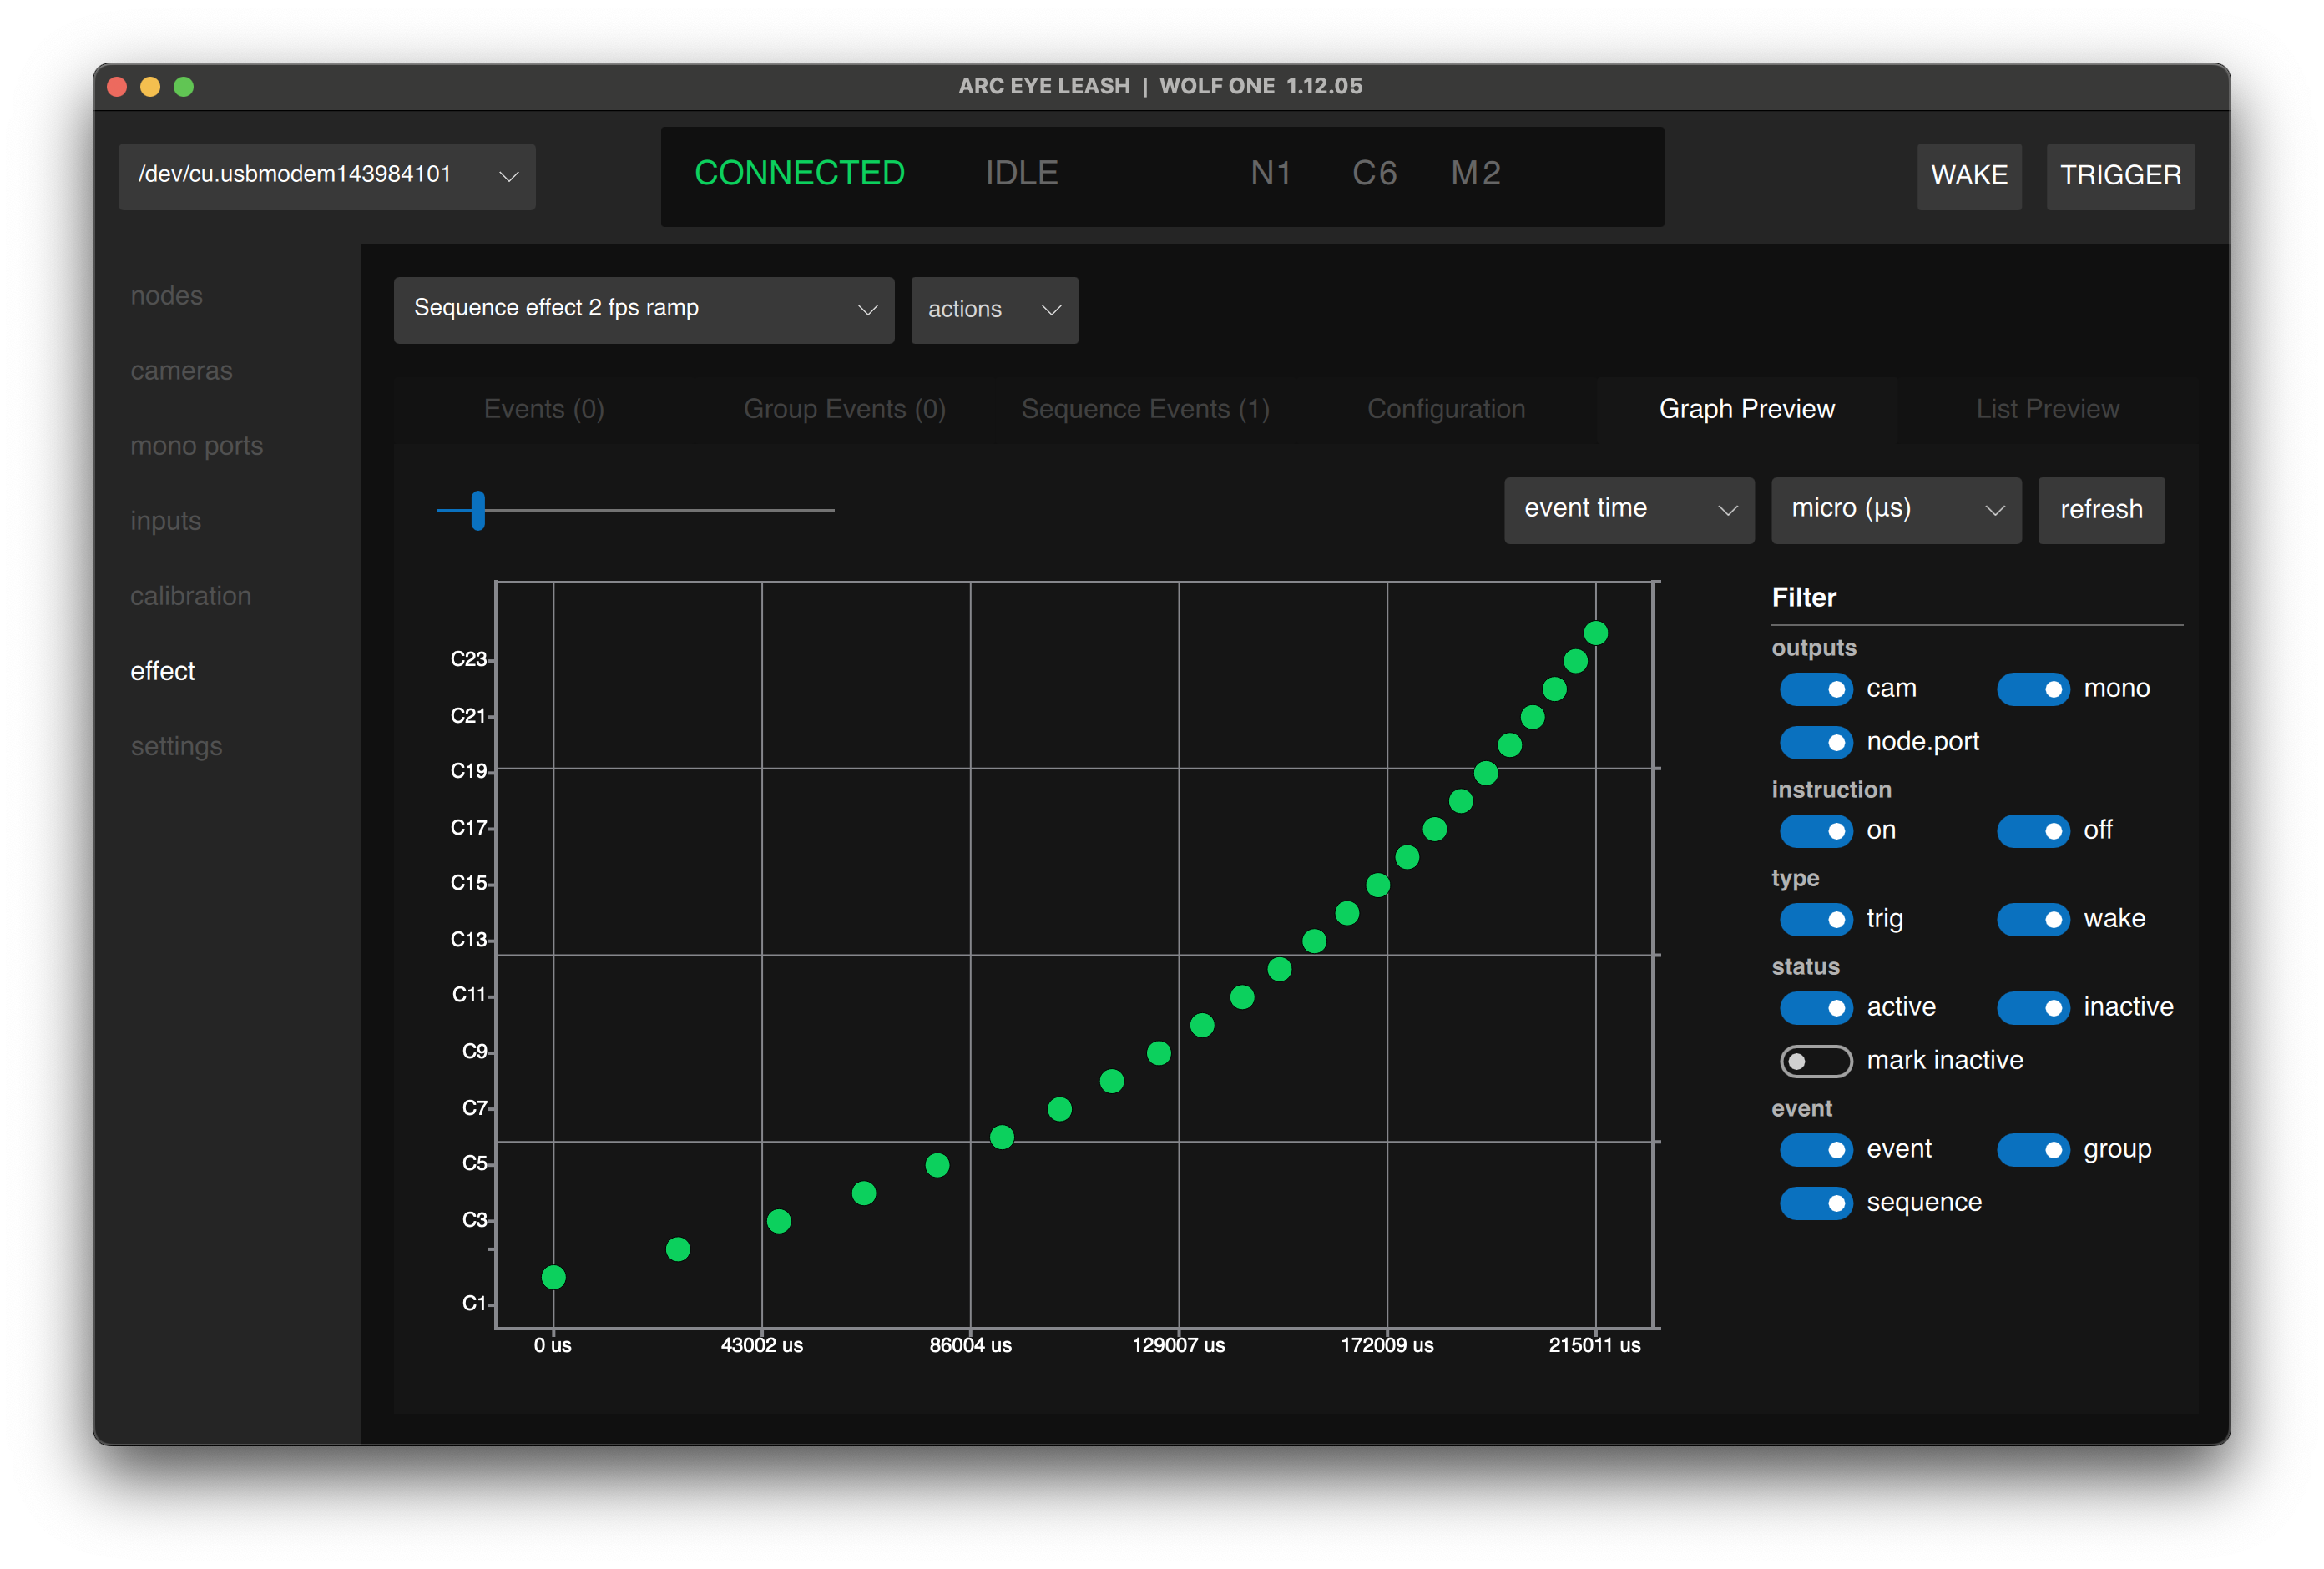
Marked Events
When mark inactive is enabled in the filter panel, events for disconnected or disabled ports appear grey. This helps identify which events won't fire with your current setup.
To view all events normally, disable the mark inactive filter.
Done!
Time to capture.
Effects are automatically calculated and applied when you click save or select an effect. The status bar briefly shows CALCULATING when changes are applied. Most effects take less than a second to calculate.
- Output numbers are re-assigned when WOLF nodes are added or their position in the chain changes.
- Preview pages show timing as calculated by the node.
- Standard events can overlap with group events and sequence events. They merge automatically.
Effect Specifications
Event Timing
Minimum Event Spacing: 300µs
- Events can be programmed at any arbitrary time (not grid-based)
- Consecutive events must be spaced at least 300µs apart
- Maximum theoretical event rate: ~3,333 events per second
Effect Capacity
| Parameter | Value |
|---|---|
| Unique Events | 2000 per effect |
| Output Instructions | 12,000 per node |
| Supported Ports | Cameras (6) + Mono (2) per node |
- Unique Events: Distinct time-based events (multiple ports can be triggered per unique event)
- Output Instructions: Individual port instructions
Next Step
Having issues? See Troubleshooting